Before to start using Gmvault, you should check that Gmail is properly configured to let Gmvault work optimally.
Enabling IMAP in Gmail
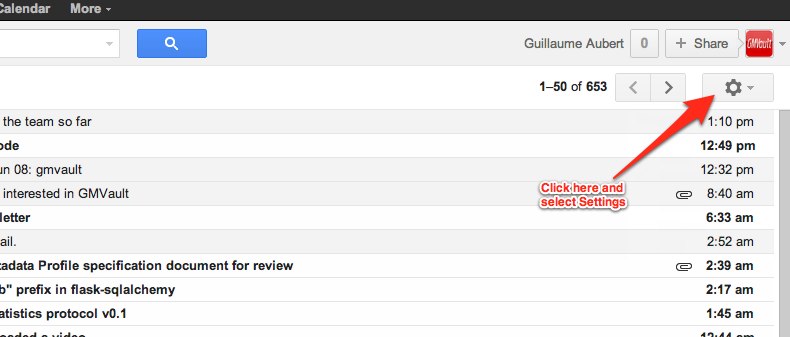
Go to GMail settings:

Click on the Gmail Settings button on the right top side and click on Forwarding and POP/IMAP option.
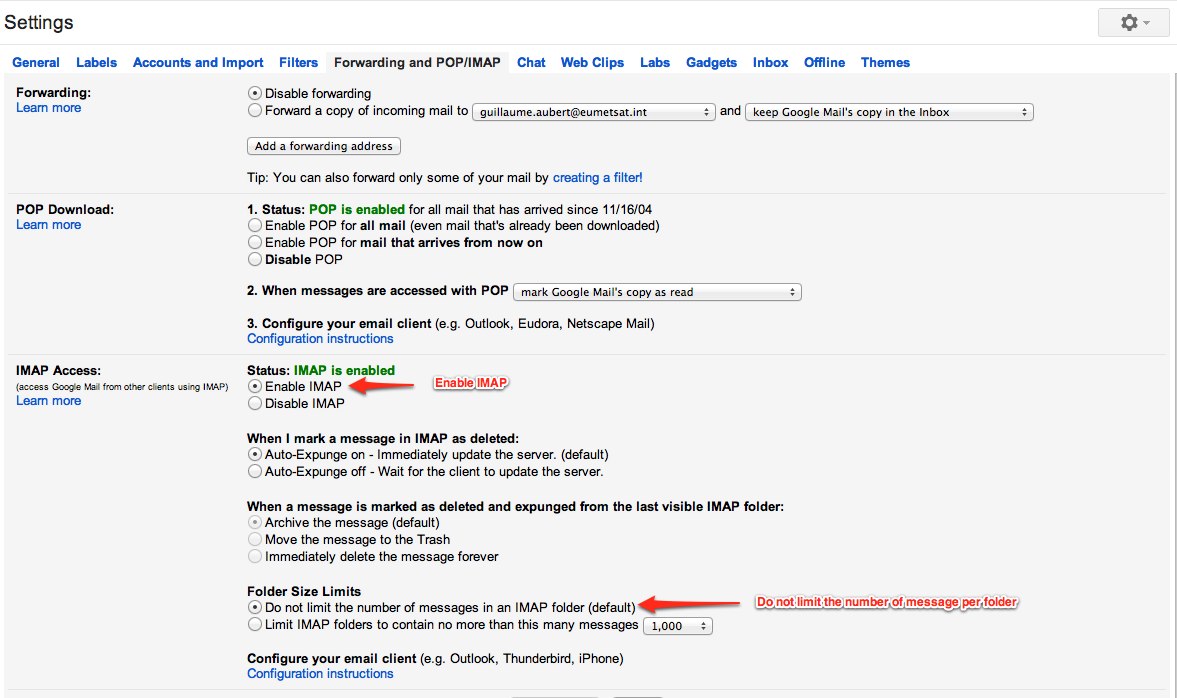
Click on Forwarding and POP/IMAP:

You can now enable IMAP and disable the limit of emails per folders.
Enabling IMAP and disabling the limit of emails per folders:

Enabling specific folders on Gmail IMAP
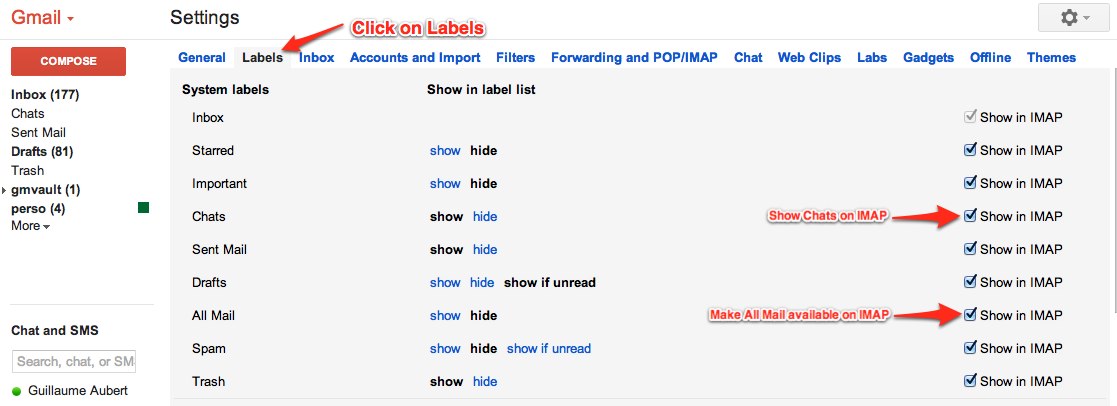
You will also have to make the folders "All Mail" and "Chats" available on Gmail IMAP.
Go to Labels:

With these setting, Gmvault should work like a charm.
Once you have installed and configured Gmvault (see Install and Gmail Setup), you can start using it in 2 minutes. Go to the bin directory of your distribution and simply type:
$>cd GMVAULTHOME/bin
$>./gmvault sync foo.bar@gmail.com
You will have to authenticate yourself the first time you use Gmvault for a particular account. Just follow the instruction given on screen. After that Gmvault will automatically authenticate itself using the credentials stored in $HOME/.gmvault (or %HOME%/.gmvault for Windows). Once authenticated, Gmvault will start to backup your complete gmail account by default into $HOME/gmvault-db or %HOME%/gmvault-db. To restore your emails into an account use the following command:
$>./gmvault restore MYNEWfoo.bar@gmail.comBy default, Gmvault will restore the emails from $HOME/gmvault-db or %HOME%/gmvault-db into the given account. Use the -d or --db-dir to point to another local email repository. It is recommended to have one local email repository per account but with the option -m , --multiple-db-owner you can backup multiple Gmail accounts in one repository. You might have to enter into an authentication phase if it is a new account for gmvault. Gmvault will store all credentials into $HOME/.gmvault (or %HOME%/.gmvault for Windows) and you can always go this directory and delete them if you wish. If you wish to daily backup you email box please use the following command:
$>./gmvault sync -t quick foo.bar@gmail.com
That command will try to update the given local repository with the last two months of emails. Only new emails contents will be downloaded so it should only take few minutes. For more information regarding the different Gmvault options, please refer to the In Depth part of the documentation.